Link/Unlink Points
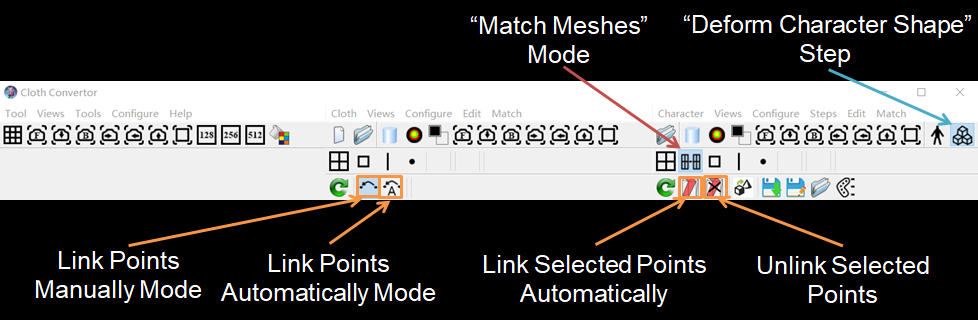
Link Points
Linking points creates some point pairs with each pair consisting of a vertex of the right mesh and a 3D position in the middle scene. The 3D position may not be necessarily on the middle model. There are three methods to link points as follows.
Link Points Manually
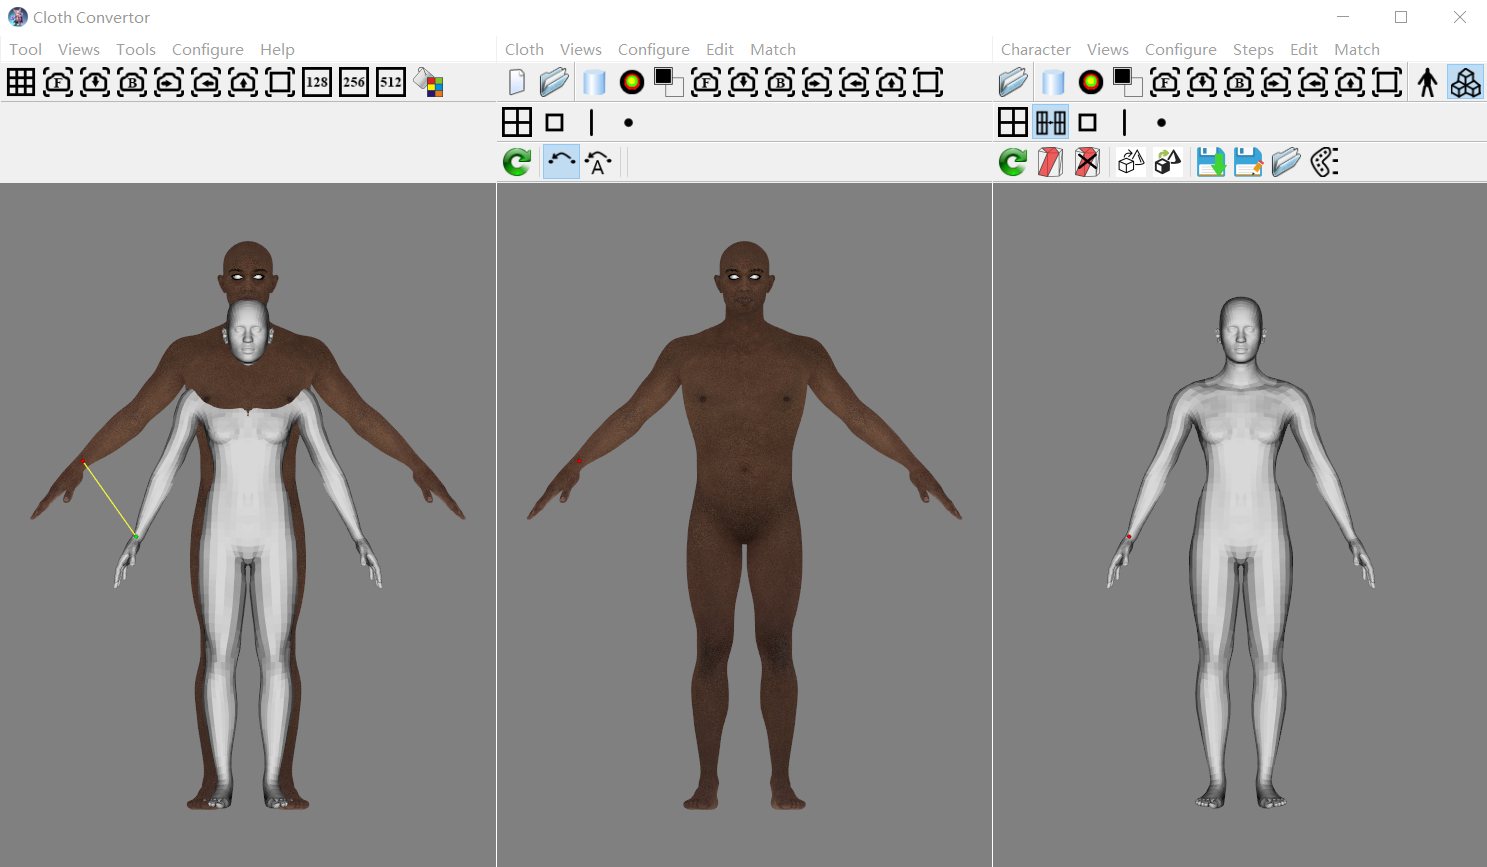
Click the "Link Point Manually Mode" mode, then create point pairs using the following two steps:
-
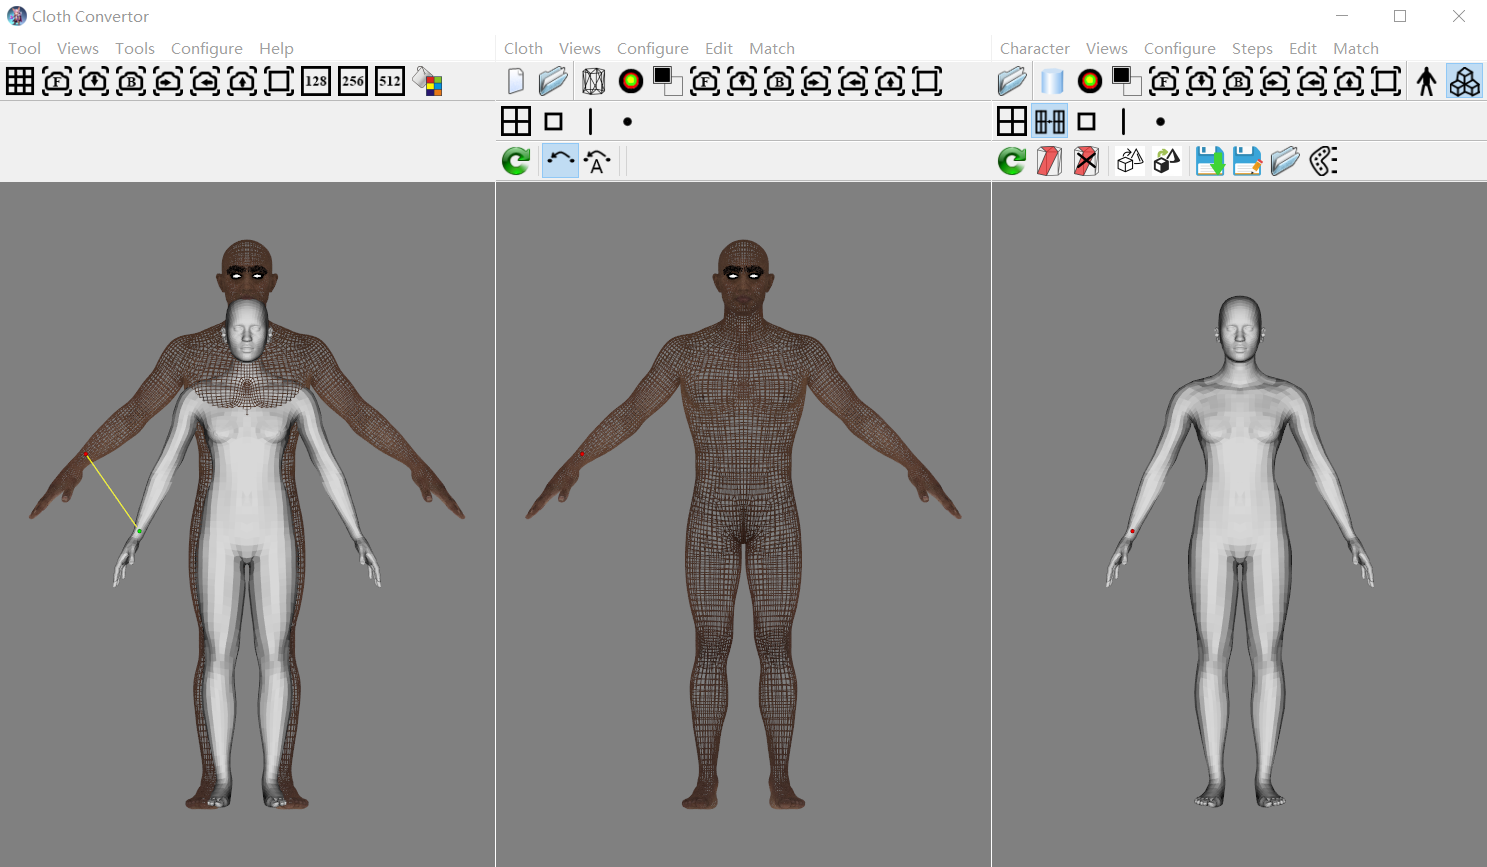
Move mouse pointer over a vertex of the right mesh, click the right mouse button, the clicked vertex is indicated by a red ball; click more if you need;
-
Move mouse pointer over a position on the middle model, click the right mouse button, the clicked position is indicated by a red ball, and a pair is created and displayed with a connecting yellow line in the left viewport; click more if needed to complete all pairs.
If you click more than on points consecutively on one model, then when you complete all pairs, if all the consecutively clicked points on the middle model is on one mesh, then a dialog will be pop up to ask if you want to match lines using the recently clicked point pairs, if you answer "Yes", two lines will be created using these points on the models respectively and matched.
This is often used to match points hard to click, such as those inside armpits. It can also be used to match lines such as waistlines.
The consecutively clicked points must be able to be connected, otherwise the tool will crash.
Link Points Automatically One by One
Click the "Link Point Automatically Mode" mode, then create each point pair one by one using the following step:
- Move mouse pointer over a vertex of the right mesh, click the right mouse button, the clicked vertex is indicated by a red ball;
at the same time, instead of manually creating the corresponding point, the position of the clicked point is used to automatically create the pair, indicated by a red ball in the middle scene.
The point pair is displayed with a connecting yellow line in the left viewport.
This is often used to fix some vertices during deforming.
If you firstly click on the middle model, then the points will be linked manually.
Link Selected Points Automatically
Firstly click the "Edit/Edit Faces" button in the right scene, create one or more regions to select some vertices.
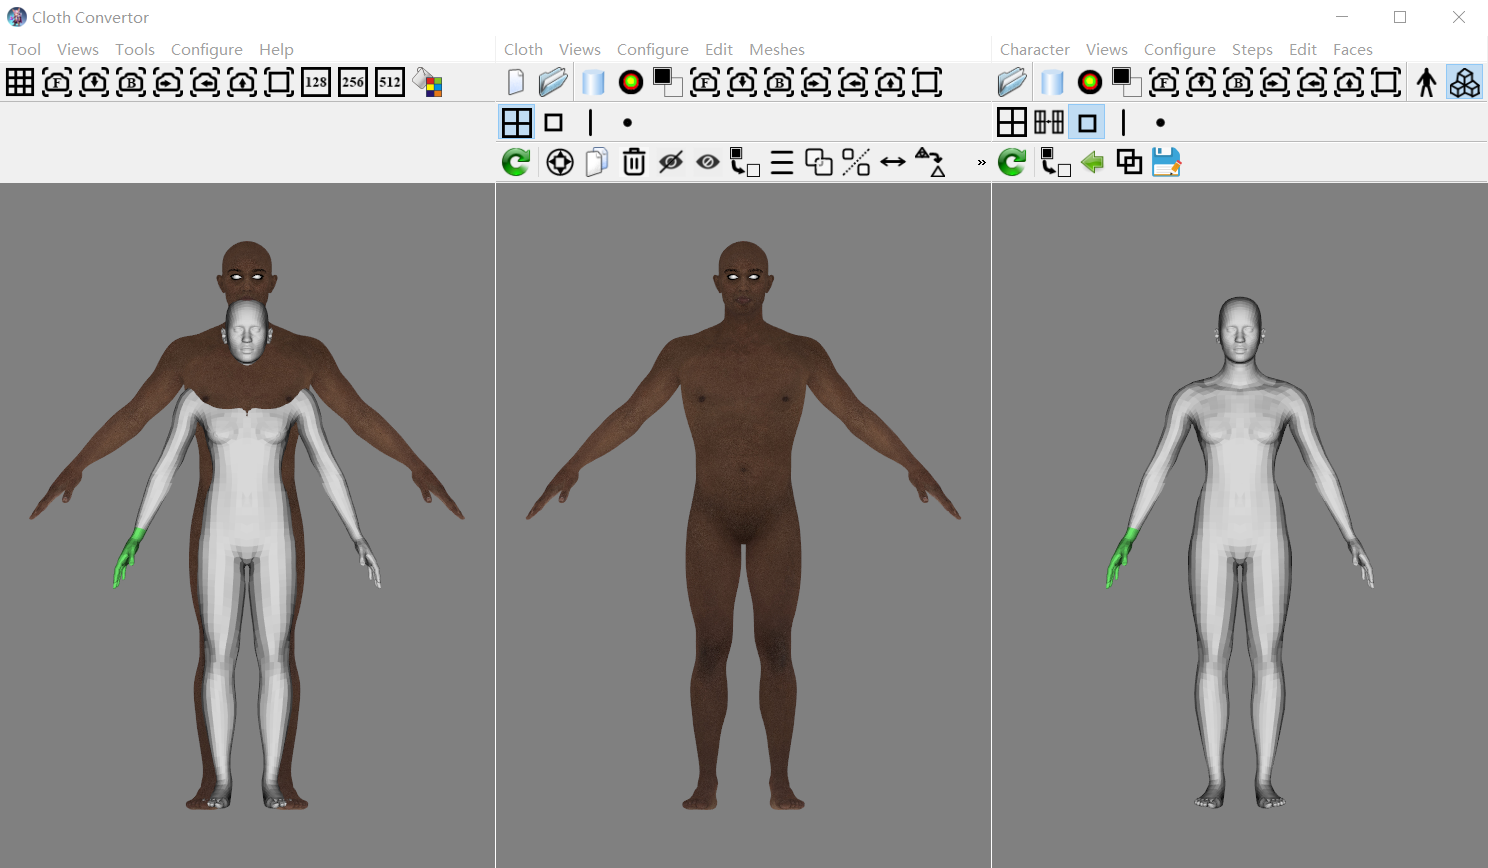
Then click the "Match Meshes" button, click the "Link Selected Points Automatically" button, a point pair is created for each of the selected vertices.
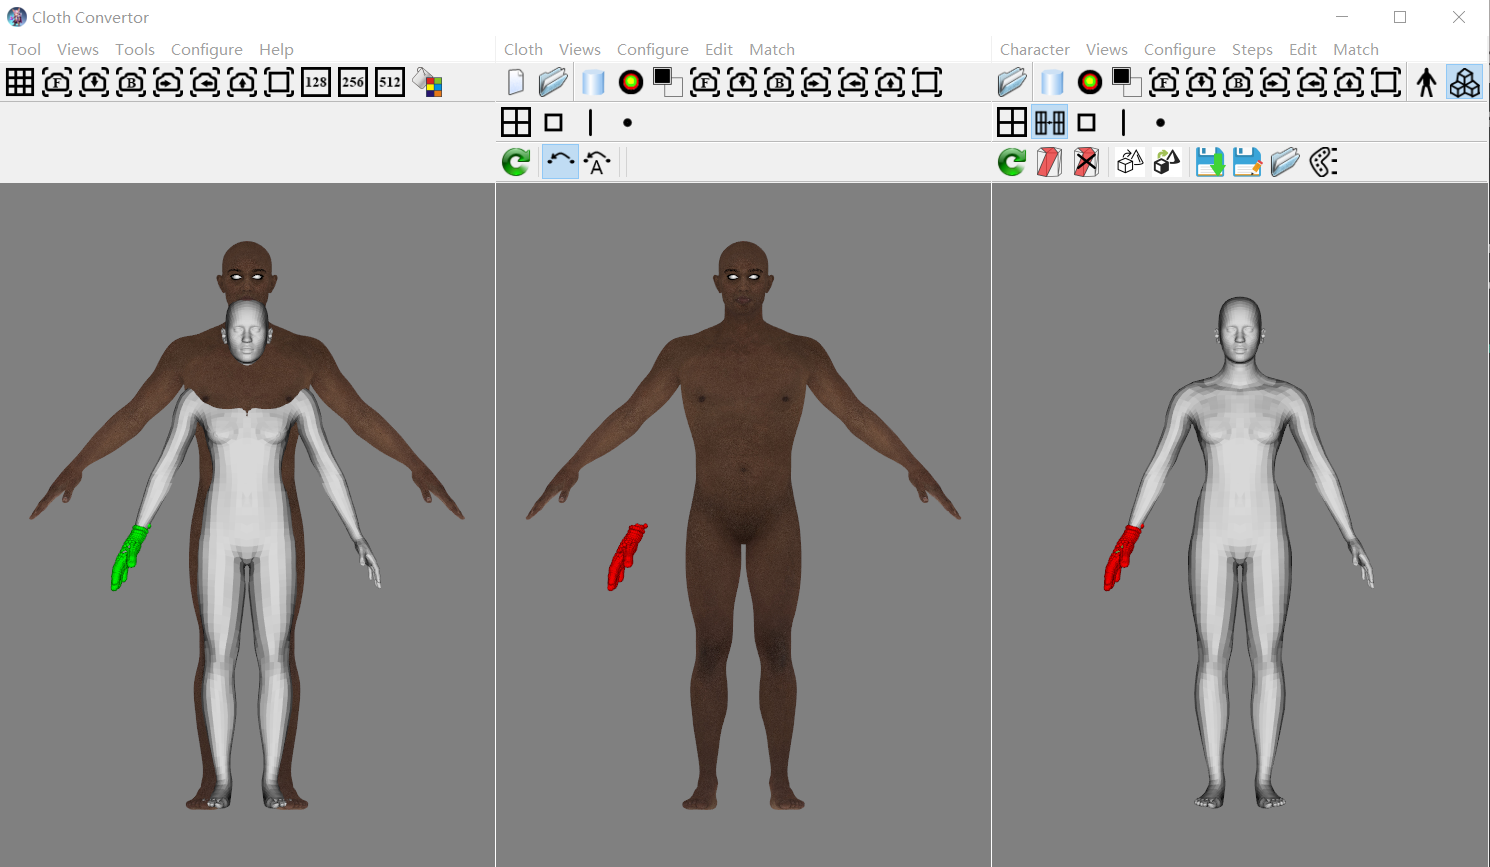
This is often used to fix some vertices during deforming.
Adjust Positions
The position of the corresponding point in the middle scene can be adjusted using the following steps:
- Set the "Shading" of the middle model to "Wireframe"
- Move mouse pointer over the corresponding point in the middle scene, press the right mouse button and move the mouse point simultaneously, the corresponding point will be moved in the plane perpendicular to the camera view direction.
Unlink Points
Unlink Points One by One
To delete a point pair, move mouse pointer over its vertex of the right mesh, click the right mouse button, the pair will be deleted.
Unlink Selected Points
More than one point pairs can be deleted together using the following two steps:
-
click the "Edit/Edit Faces" button in the right scene, select the vertices of these pairs by creating a region,
-
click the "Match Meshes" button, click the "Unlink Selected Points" button, these pairs will be deleted.