Interface, Scenes and Views
All the tools share a common interface framework with minor customization for each tool, as shown in the following figure:
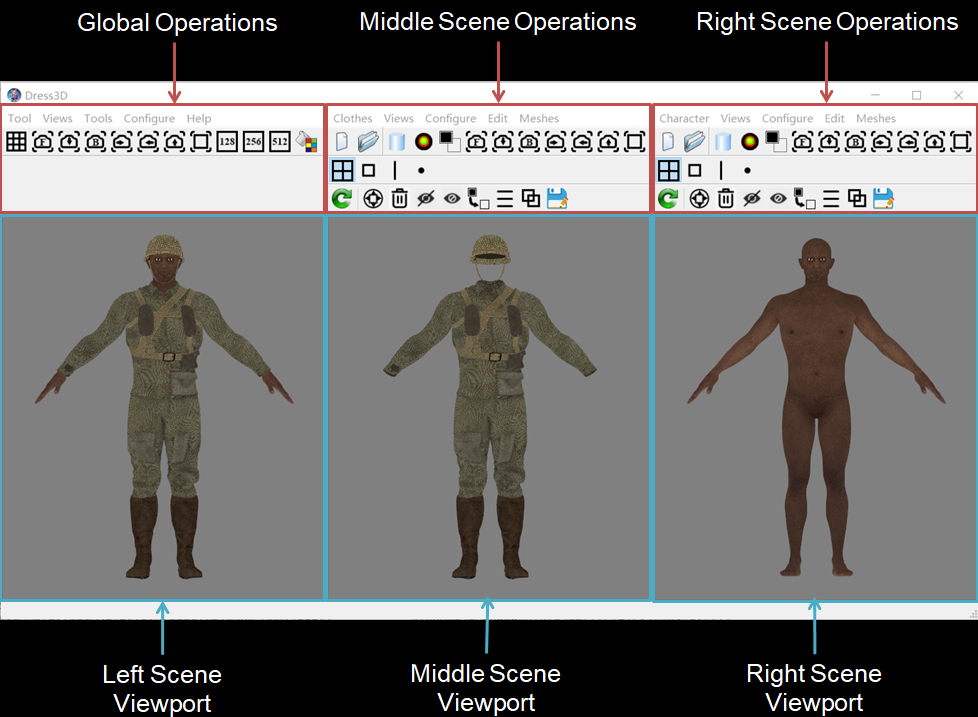
All the tools operate on three 3D scenes: left, middle and right. All the scenes use a common right-hand coordinate system (x: left, y: up, z: forward) with system unit of 1 meter.
Each scene has a view port in the interface. The view cameras of these view ports are synchronized, so you always view the three scenes from the same view point and projection.
The middle and right scenes are independent, each contains its own models/assets. The left scene always contains the combination of the models/assets in the other scenes.
The usage of the three scenes is tool-dependent. For example, when used in Cloth Convertor, the middle and right scenes contain a cloth and a base character respectively, and the left scene shows how they fit each other.
Menu and Tool Buttons
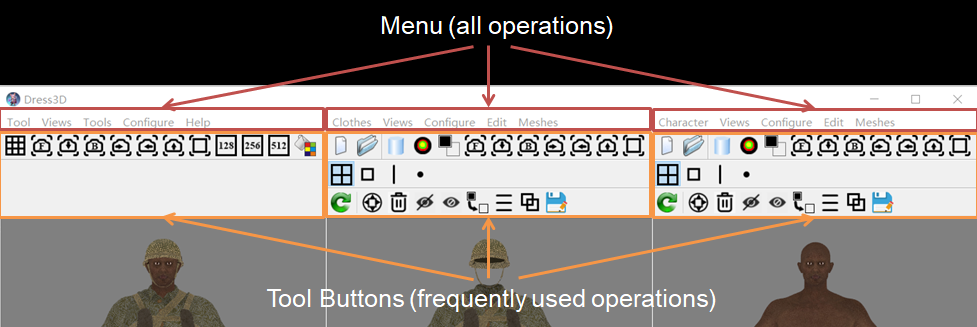
Placing the mouse pointer over a tool button and staying for a second will pop up the name of the button.
Account and Import/Export Model/Asset
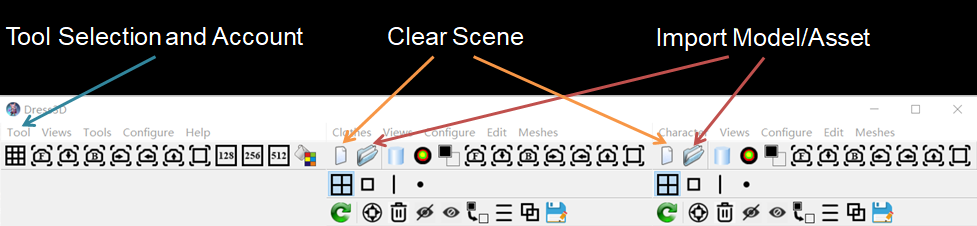
In Clothy3D Studio, you can select the tool to use.
Each tool has its own account information containing:
- your email address
- current available monthly exports
The middle and right scenes are independent, each can import and export its own models/assets. The left scene can not import its own models/assets, but instead always contains the combination of the models/assets in the other scenes as, whenever a model/asset is imported to the middle or right scene, it is also imported to the left scene.
Configure Viewing
The following figure shows all the buttons for configuring the viewing.
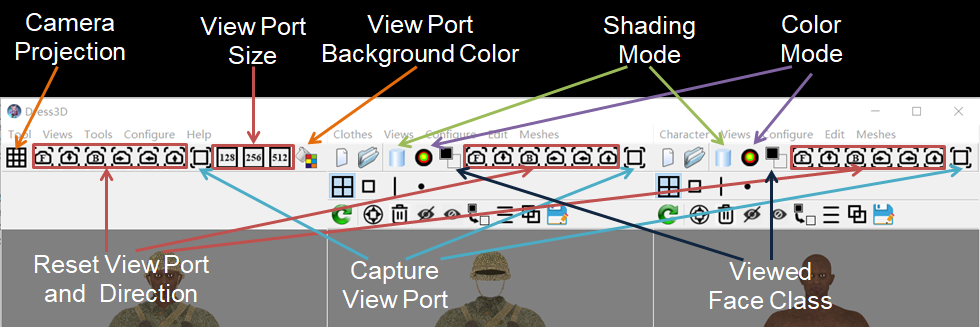
When a model is imported by a tool, each face of the model is assigned a two-fold class attribute: front (default) and back. This attribute can be changed by user operation, and facilitates the editing. The "Viewed Face Class" button is used to determine which class of faces is viewed.
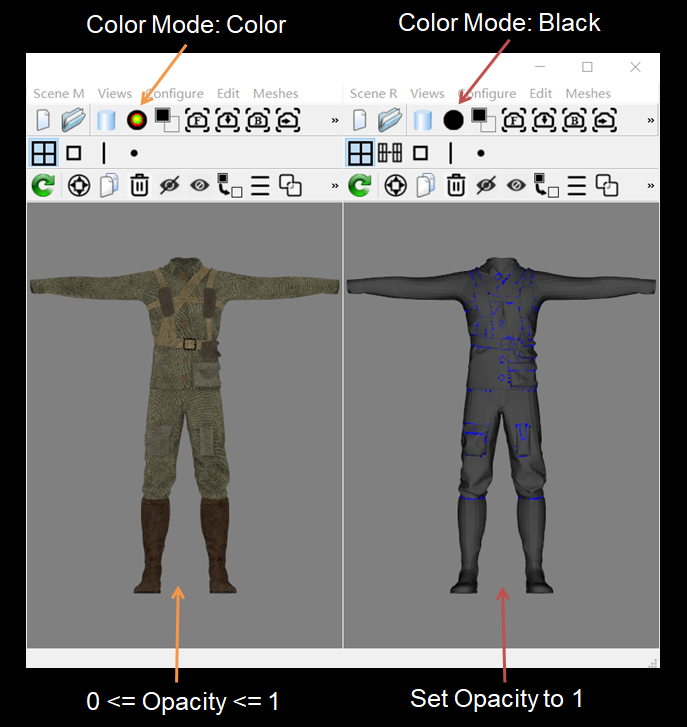
The "Color Mode" button allows three settings: color, black or white. In the color setting, all the materials are displayed as normal using their original opacity in the range of 0 to 1. In the black or white mode, all the materials are displayed by setting opacity to 1 and \ albedo color to black or white except that the stitching faces' blue color is not changed. The black and white modes can be used to view all meshes including fully transparent ones and the blue stitching faces added to merge meshes and stitch regions.
Mouse Operation in Viewport
- Left Button: Move mouse while pressssing this button to rotate camera around its focal point
- Middle Button: Move mouse while pressssing this button to pan camera
- Wheel: Scroll forward/Backward to zoom in/out
- Right Button:
- In left view port: Move mouse while pressssing this button to pan camera
- In middle/right view port: Reserved by Clothy3D for editing meshes, faces, edges, vertices, and linking points.
Edit Mode Selection Using Layered Tool Buttons
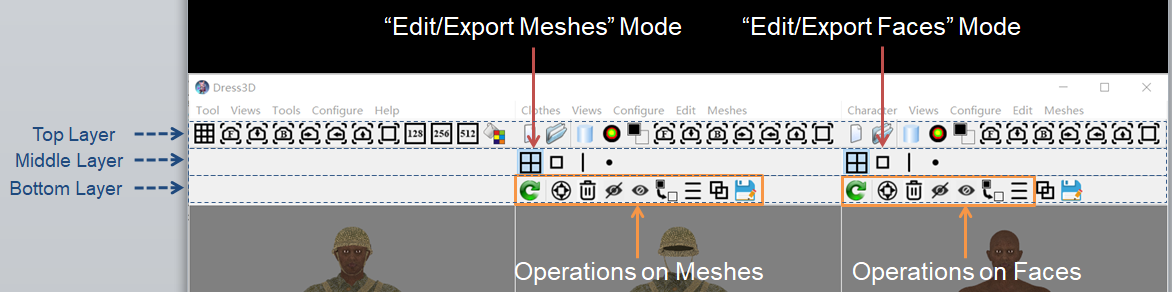
Tool buttons are shown in layers. The buttons in each layer are dependent on the button clicked in the layer above. This allows setting editing mode using tool buttons.
For example, all the buttons in the middle layer are used to set edit mode. When the "Edit/Export Meshes" button in the middle layer is clicked, the bottom layer shows only the operations on meshes.